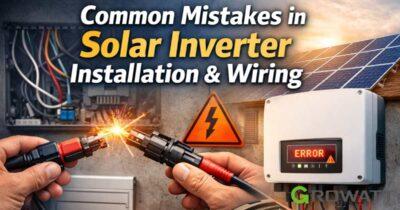
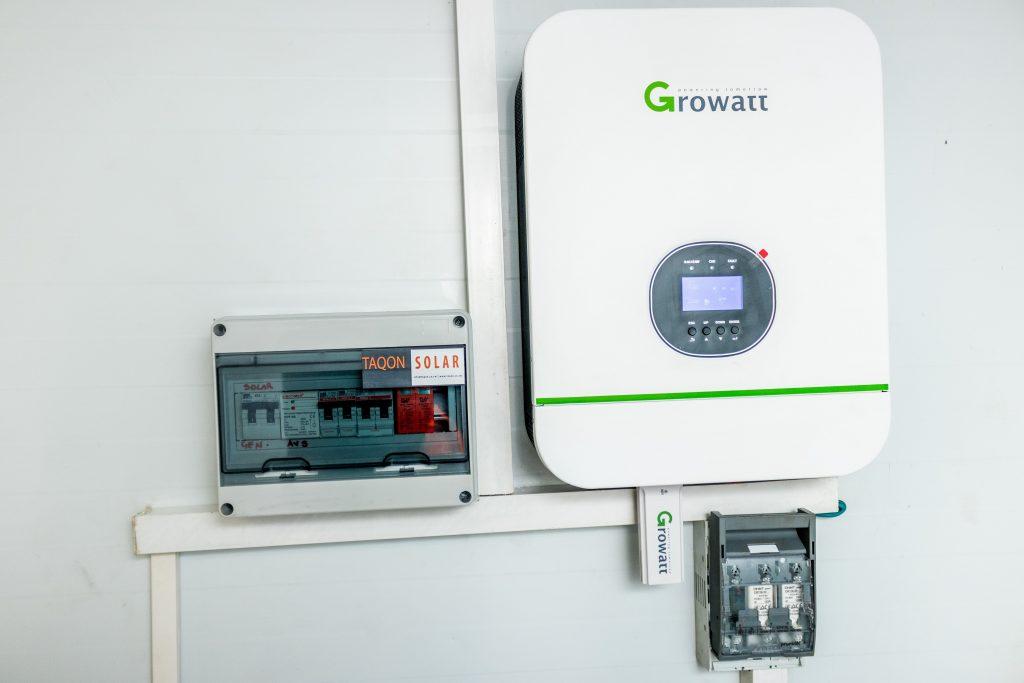
Installing a solar inverter is an important part of setting up a solar power system. The inverter converts the DC electricity produced by solar panels into AC electricity that can be used by household appliances or supplied to the electrical grid.
Safety Note: Solar inverter installation involves potentially hazardous DC and AC voltages. Electrical work should be carried out by a qualified electrician or solar professional and must follow the inverter manufacturer’s instructions and applicable local electrical codes.
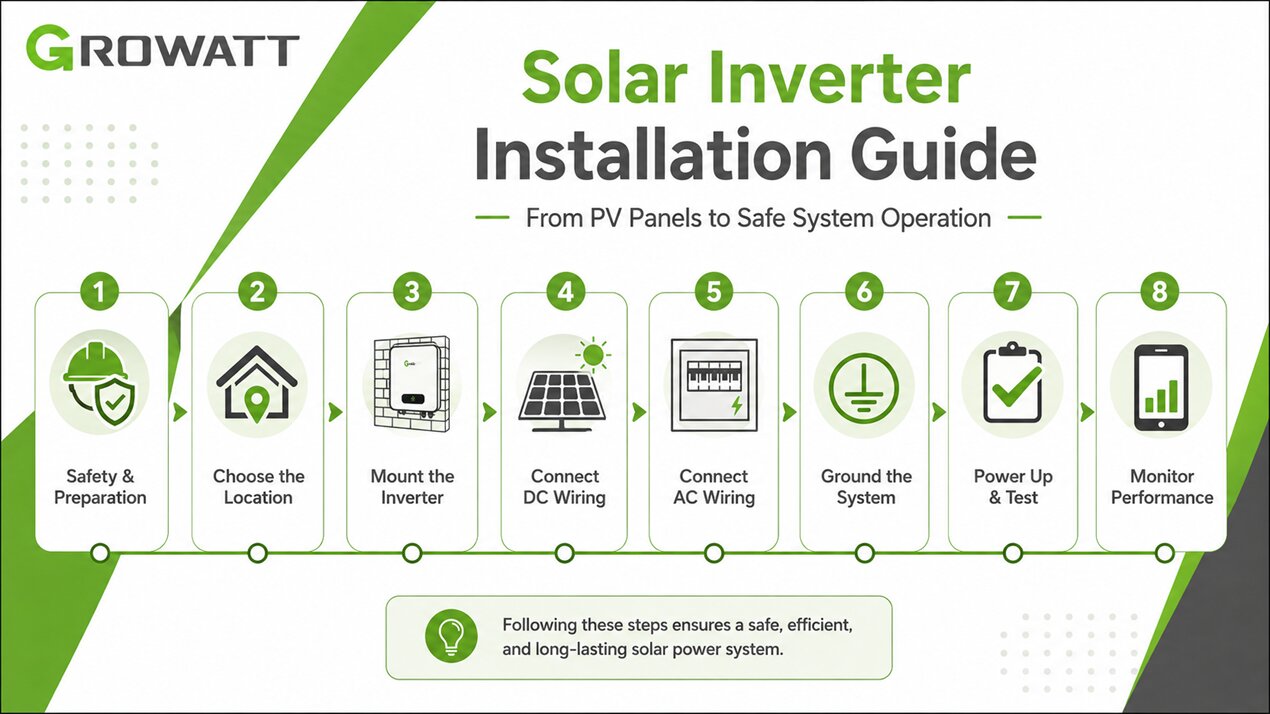
Solar Inverter Installation at a Glance
The installation process generally includes the following stages:
| Step | Installation Stage | Main Task |
|---|---|---|
| 1 | Preparation and Safety | Gather equipment, review specifications and isolate power sources |
| 2 | Location Selection | Choose a suitable, accessible and well-ventilated area |
| 3 | Mounting | Secure the inverter to an appropriate wall or structure |
| 4 | DC Connections | Connect the PV array to the inverter |
| 5 | AC Connections | Connect the inverter to the electrical system |
| 6 | Grounding | Complete the required grounding connections |
| 7 | Startup and Testing | Follow the manufacturer’s startup procedure and check operation |
| 8 | Monitoring | Configure monitoring and review system performance |
What You Need Before Installing a Solar Inverter
Before starting the installation, check the inverter documentation and confirm that the equipment is compatible with the solar array and electrical system.
Typical installation equipment may include:
- Solar inverter
- Solar panels and PV wiring
- DC disconnect or isolator, where required
- AC circuit breaker
- Appropriate DC and AC cables
- Mounting brackets or mounting hardware
- Grounding conductor and required grounding hardware
- Cable connectors and terminals
- Multimeter and appropriate electrical test equipment
- Insulated tools and personal protective equipment
The exact components depend on the inverter model, system configuration, local regulations, and whether the system is grid-connected, hybrid, or off-grid.
Step 1: Prepare the System and Follow Safety Requirements
Read the inverter installation manual before making any electrical connections. Pay particular attention to the specified DC voltage range, maximum PV current, AC requirements, grounding method, environmental limits, and required clearances.
Power sources must be isolated before electrical work begins. Solar panels can continue producing DC voltage whenever they receive sufficient sunlight, so simply switching off the AC supply does not make the entire system safe.
Keep the installation area dry and free from unnecessary tools, moisture, dust, and combustible materials.
Important Safety Checks
| Check | Why It Matters |
|---|---|
| Disconnect electrical sources | Reduces the risk of electric shock |
| Verify polarity | Prevents incorrect DC connections |
| Check voltage | Confirms the PV input is within the inverter’s limits |
| Use correct cable sizes | Helps prevent excessive voltage drop and overheating |
| Follow manufacturer instructions | Installation requirements vary between models |
| Use appropriate protection | Helps protect the inverter and electrical system |
Step 2: Choose the Right Solar Inverter Installation Location
The installation location affects ventilation, operating temperature, maintenance access, cable length, and the long-term reliability of the inverter.
A suitable location should be:
- Dry and protected from excessive moisture
- Well ventilated
- Away from direct heat sources
- Protected from unnecessary exposure to direct sunlight
- Accessible for inspection and maintenance
- Strong enough to support the inverter
- Close enough to the electrical equipment to keep cable runs practical
Do not choose a location solely because it is close to the solar panels. The surrounding temperature, ventilation, protection from weather, and accessibility are equally important.
Recommended Installation Locations
| Location | Advantages | Important Considerations |
|---|---|---|
| Garage | Protected from weather and usually accessible | Avoid excessive heat and poor ventilation |
| Utility Room | Convenient for maintenance and electrical connections | Check ventilation and available wall space |
| Exterior Wall | Easy access and potentially short cable runs | Protect equipment from direct sun and severe weather |
| Attic | Can provide a dedicated installation area | Temperature and ventilation must remain within manufacturer limits |
| Electrical Cabinet/Service Area | Organized installation and equipment protection | Requires adequate space, ventilation and accessibility |
Garage
A garage can be a practical location for a growatt inverter because it often provides protection from rain and direct weather exposure. It may also be close to the home’s main electrical panel.
However, garages can become very hot. Make sure the inverter remains within its specified operating temperature range and has the required ventilation clearance.
Utility Room
A utility room is another practical option, particularly when electrical equipment is already installed there. Maintenance is generally easier when the inverter can be reached without special equipment.
Avoid installing the inverter in a cramped enclosure unless the manufacturer specifically allows it.
Exterior Wall
Outdoor installation is common for many solar inverters. An exterior wall can provide good ventilation and convenient access.
The inverter should not be placed where it is exposed unnecessarily to direct sunlight, standing water, flooding, or other environmental hazards. Follow the equipment’s IP rating and installation instructions.
Attic
An attic should only be considered when temperature and ventilation conditions are suitable. During summer, attic temperatures can become significantly higher than outdoor temperatures.
Check the inverter’s permitted operating temperature before selecting an attic installation site.
Dedicated Electrical Area
A dedicated electrical cabinet or service area can keep the inverter and associated protection equipment organized. There must still be sufficient space for heat dissipation, inspection, servicing, and cable routing.
Step 3: Mount the Solar Inverter
Once the location has been selected, install the mounting hardware according to the manufacturer’s specifications.
The mounting surface needs to be structurally suitable for the inverter’s weight. Use the recommended mounting points and hardware rather than improvising the fixing method.
Maintain the manufacturer’s required clearance around the equipment. The commonly repeated “6-inch clearance” should not be treated as a universal rule because different inverter models have different requirements.
The inverter should also be mounted in the orientation specified by the manufacturer.
Step 4: Connect the Solar Panels to the Inverter
The PV array supplies DC electricity to the inverter through the DC input circuit.
Before connecting the conductors, verify:
- PV string voltage
- Maximum current
- Polarity
- Connector compatibility
- Cable size
- Insulation condition
- Number of strings
- MPPT configuration
Connect the positive and negative PV conductors to the corresponding terminals on the inverter, following the polarity markings and wiring instructions for the specific model.
Do not rely only on wire color. Always verify polarity with the appropriate test equipment and the manufacturer’s documentation.
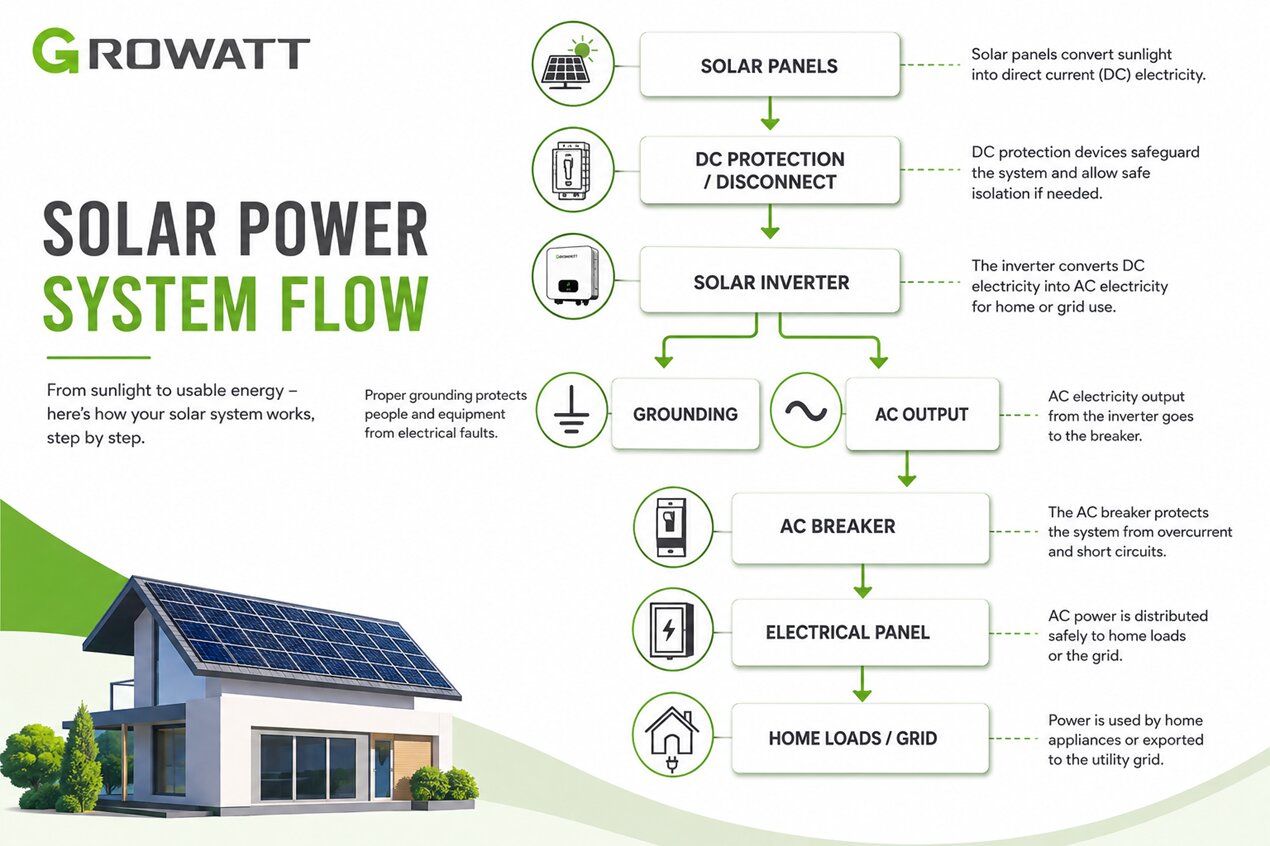
DC Wiring Checklist
| Item | What to Check |
|---|---|
| PV Voltage | Must remain within the inverter’s permitted DC input range |
| PV Current | Must not exceed the inverter’s specified input limits |
| Polarity | Positive and negative connections must be correctly identified |
| Cable Size | Must be appropriate for current and cable length |
| Connectors | Must be compatible and properly secured |
| DC Protection | Disconnects, fuses or other protection may be required depending on system design |
A DC disconnect may be required between the PV array and inverter depending on the equipment and local electrical requirements. It should be installed and rated for the applicable DC voltage and current.
Step 5: Connect the Inverter to the AC Electrical System
The AC side connects the inverter to the building’s electrical system or, in a grid-connected installation, to the utility connection.
The exact wiring arrangement depends on the inverter type.
For example, an off-grid system may supply dedicated loads, while a grid-connected inverter normally connects through an appropriate AC protection device and electrical panel.
If you are selecting equipment for an independent solar system, a Growatt off grid inverter can be used in systems designed to operate without a utility grid, depending on the model and system requirements.
Before making AC connections, verify the inverter’s rated AC voltage, frequency, phase configuration, breaker requirements, and conductor specifications.
The AC circuit should be protected using equipment suitable for the inverter and installation.
Step 6: Ground the Solar Inverter
Grounding is an essential part of a safe electrical installation.
Connect the inverter’s grounding terminal and other required equipment to the building or system grounding arrangement according to the manufacturer’s instructions and applicable electrical code.
Do not assume that simply connecting a wire to a nearby metal object provides an adequate grounding path.
Grounding requirements can vary depending on the system configuration, inverter design, battery equipment, and local regulations.
A qualified electrician should verify the completed grounding system using the appropriate testing procedures.
Step 7: Power Up and Test the System
Do not use a universal startup sequence for every inverter. Different manufacturers and models may require different procedures.
Follow the startup instructions provided for your specific inverter.
Before energizing the system, inspect:
- DC connections
- AC connections
- Grounding
- Disconnects
- Circuit breakers
- Cable routing
- Connector condition
- Mounting hardware
- Required clearances
Once the system has been energized according to the manufacturer’s procedure, check the inverter display or monitoring platform for operating status, PV input, AC output, warnings, and fault messages.
What to Check After Startup
| Parameter | What to Look For |
|---|---|
| PV Input | Appropriate DC voltage and current |
| AC Output | Correct voltage and frequency |
| Operating Status | Normal operation without active faults |
| Temperature | Within the specified operating range |
| Communication | Monitoring connection functioning correctly |
| Energy Production | Production consistent with available sunlight and system conditions |
Step 8: Set Up Monitoring and Perform Final Checks
Many modern solar inverters include Wi-Fi, Ethernet, Bluetooth, or other communication options.
After installation, configure the manufacturer’s monitoring platform if supported. Monitoring makes it easier to identify changes in energy production, system warnings, and recurring faults.
Keep a record of the inverter model, serial number, installation date, configuration settings, and relevant electrical test results.
This information can be useful during future maintenance or troubleshooting.
Best Places to Install a Solar Inverter
There is no single location that is ideal for every solar installation. The best position depends on climate, system design, cable routing, ventilation, accessibility, and the inverter manufacturer’s requirements.
For most installations, the goal is to find a location that provides adequate cooling, protection, short and practical cable routes, and easy access for maintenance.
Indoor vs. Outdoor Solar Inverter Installation
Many inverters are designed for outdoor installation, while others may be installed indoors. The correct choice depends on the inverter’s enclosure rating and installation instructions.
Outdoor installation can simplify ventilation and maintenance, but the inverter should be protected from excessive sunlight, flooding, and environmental conditions outside its rated limits.
Indoor installation provides additional protection from weather and may reduce exposure to extreme environmental conditions. However, an indoor space still needs adequate ventilation.
Cable Distance Between Solar Panels and Inverter
Cable distance is an important consideration when selecting an inverter location.
Long DC cable runs can increase resistance and voltage drop. This may lead to additional electrical losses and increased installation costs.
At the same time, placing the inverter as close as possible to the panels is not always the best overall design choice. AC cable length, electrical panel location, battery placement, accessibility, and system architecture also need to be considered.
A properly designed system balances these factors rather than focusing on distance alone.
For grid-connected installations, the selected growatt on grid inverter should be installed according to its electrical specifications and the requirements of the complete PV system.
Frequently Asked Questions
Can I install a solar inverter myself?
Solar inverter installation involves hazardous DC and AC voltages, so professional installation is recommended. A qualified electrician or solar installer can verify wiring, grounding, protection devices, system compatibility, and compliance with local electrical requirements.
Where is the best place to install a solar inverter?
The best location is generally a dry, well-ventilated and accessible area protected from excessive heat, moisture, flooding and direct sunlight. The location should also provide adequate clearance and practical cable routing according to the inverter manufacturer's requirements.
Should a solar inverter be installed indoors or outdoors?
Either option may be suitable depending on the inverter's enclosure rating and installation instructions. Outdoor installation can provide good ventilation, while indoor installation can offer additional environmental protection. Temperature, humidity, accessibility and ventilation should be considered in both cases.
How far can a solar inverter be from solar panels?
There is no single maximum distance that applies to every installation. Cable size, voltage, current, system design and allowable voltage drop all affect the appropriate distance. The PV system should be designed to keep cable losses within acceptable limits.
Does a solar inverter need ventilation?
Most inverters require adequate ventilation and clearance to dissipate heat. The exact clearance depends on the model. Ventilation openings should not be blocked, and the manufacturer's installation requirements should always be followed.
Can a solar inverter be installed in a garage?
Yes, a garage can be a suitable location when temperature, ventilation, humidity and clearance requirements are met. Garages that become extremely hot or contain excessive dust or corrosive materials may not be suitable.
Can a solar inverter be installed in an attic?
An attic may be suitable only when the temperature remains within the inverter's specified operating range and there is sufficient ventilation and maintenance access. Extremely hot attic spaces should generally be avoided.
How much does solar inverter installation cost?
The cost depends on inverter capacity, inverter type, labor, electrical upgrades, cable requirements, permits, installation complexity and whether batteries are included. Because costs vary significantly by location and project, a local installer should provide a site-specific quotation.
How long does it take to install a solar inverter?
A straightforward residential installation may take several hours, while more complex projects involving batteries, electrical upgrades or off-grid equipment can take one or more days. The condition of the existing electrical system also affects installation time.
Does a solar inverter need grounding?
Grounding requirements depend on the inverter design, system configuration and local electrical regulations. The inverter and associated equipment should be grounded using the method specified by the manufacturer and applicable electrical code.
Why is my solar inverter producing no power?
Possible causes include insufficient sunlight, DC input problems, grid disconnection, an active protection condition, incorrect wiring, or an inverter fault. Check the display or monitoring system for error messages and consult the manufacturer's troubleshooting instructions.
Why is my solar inverter overheating?
Common causes include high ambient temperatures, direct sunlight, insufficient ventilation, blocked air passages, dust accumulation, or installation outside the inverter's environmental specifications. Persistent overheating should be checked by a qualified technician.
What should I do if my solar inverter shows an error code?
Record the exact error code and check the manual for your specific inverter model. Some faults can be related to the grid, PV input, temperature, insulation, communication or internal components. Do not repeatedly reset the system when a serious electrical fault is suspected.
How can I monitor solar inverter performance?
Depending on the inverter, performance can be monitored through a built-in display, Wi-Fi, Ethernet, Bluetooth, a dedicated monitoring device, or a manufacturer's mobile application. Monitoring can show energy production, PV input, AC output and system warnings.
What should I check before turning on a solar inverter?
Before startup, verify the DC and AC wiring, polarity, grounding, protection devices, cable connections, mounting, ventilation clearance and system configuration. Then follow the exact startup sequence specified by the inverter manufacturer.
Can a hybrid solar inverter work with batteries?
Many hybrid inverters are designed to work with battery storage, but battery compatibility depends on the inverter model and battery specifications. Voltage range, communication protocol, maximum charging and discharging current, and battery management requirements should be checked before installation.
When should I call a professional for solar inverter installation?
Professional assistance is recommended whenever the installation involves AC electrical work, high-voltage DC circuits, grid connection, grounding, electrical panel modifications, batteries, or unfamiliar equipment. A qualified installer can also verify that the completed system complies with local electrical requirements.